What is an M4B file?
M4B is an audiobook container format developed by Apple. Under the hood it is just an MPEG-4 file (same as M4A) with a couple of extras: chapters baked into the file and a bookmark that saves your place. The audio itself is typically AAC, which is actually a better codec than MP3 at equivalent bitrates, so converting to MP3 does involve a small quality trade-off.
That said, MP3 is universally supported. Older car stereos, basic MP3 players, and a lot of third-party apps do not handle M4B at all. Converting makes sense if you want to listen on a device that will not touch Apple's format.

The easy way: convert in your browser
If you do not want to install anything or write a line of terminal commands, M4BConvert handles all of this in your browser. It runs ffmpeg locally via WebAssembly, so your file never leaves your machine, and it supports the full chapter-splitting workflow out of the box.
Convert M4B to MP3 without the terminal
Drop your file, pick your chapters, and download individual MP3s per chapter. All in the browser, no upload, no account. It's the same ffmpeg commands from this guide running locally on your machine.
Try M4BConvert freeIf you're staying for the terminal walkthrough, read on.
Install ffmpeg
Everything in this guide runs through ffmpeg (and its companion
tool ffprobe), so install that first. None of the commands below
will work without it. It takes about two minutes on any platform.
macOS
Open Terminal and check if you already have Homebrew:
brew --version
If that prints a version number, skip to step 3. If it says "command not found," continue to step 2.
Install Homebrew by pasting this one-liner into Terminal (it's the official installer from brew.sh):
/bin/bash -c "$(curl -fsSL https://raw.githubusercontent.com/Homebrew/install/HEAD/install.sh)"
It'll ask for your Mac password partway through. Typing is normal, nothing will appear on screen. Let it finish, then close and reopen Terminal.
Install ffmpeg:
brew install ffmpeg
Windows
Windows does not include ffmpeg, so you have to add it yourself. If you're on
Windows 10 (2018 update or newer) or Windows 11, the fastest way is
winget. If that does not work for you, use the manual method below.
It works on every version of Windows.
Option 1: winget (fastest)
winget install ffmpeg
Let it finish, then close and reopen your terminal window and skip down to "Verify it worked" below. If you get "winget is not recognized," your Windows install is too old for it. Use Option 2 instead.
Option 2: manual install (works on any Windows version)
Go to gyan.dev/ffmpeg/builds
and, under "release builds," download ffmpeg-release-essentials.zip.
Right-click the downloaded zip and choose Extract All.
Extract it somewhere permanent, like C:\ffmpeg. Not
Downloads, and not anywhere you might delete later by accident. You should end
up with a folder that looks like
C:\ffmpeg\ffmpeg-7.1-essentials_build\bin, containing
ffmpeg.exe and ffprobe.exe. That exact folder
name will change with the version, so check what you actually got.
Add that bin folder to your PATH so Windows knows where to find it:
- Press the Windows key, type
environment variables, and open "Edit the system environment variables." - In the System Properties window, click the Environment Variables… button.
- Under "System variables" (bottom half), select Path, then click Edit…
- Click New and paste the full path to your
binfolder, for exampleC:\ffmpeg\ffmpeg-7.1-essentials_build\bin - Click OK on all three open windows to save.
Close any Command Prompt or PowerShell windows you already had open, then open a new one.
ffmpeg -version still fails after following every step, the fix is almost always to close that window and open a fresh one.
Linux
It's in your distro's package manager. Pick the matching command:
sudo apt install ffmpeg
sudo dnf install ffmpeg
sudo pacman -S ffmpeg
Verify it worked
Whichever method you used, confirm it from a fresh terminal window:
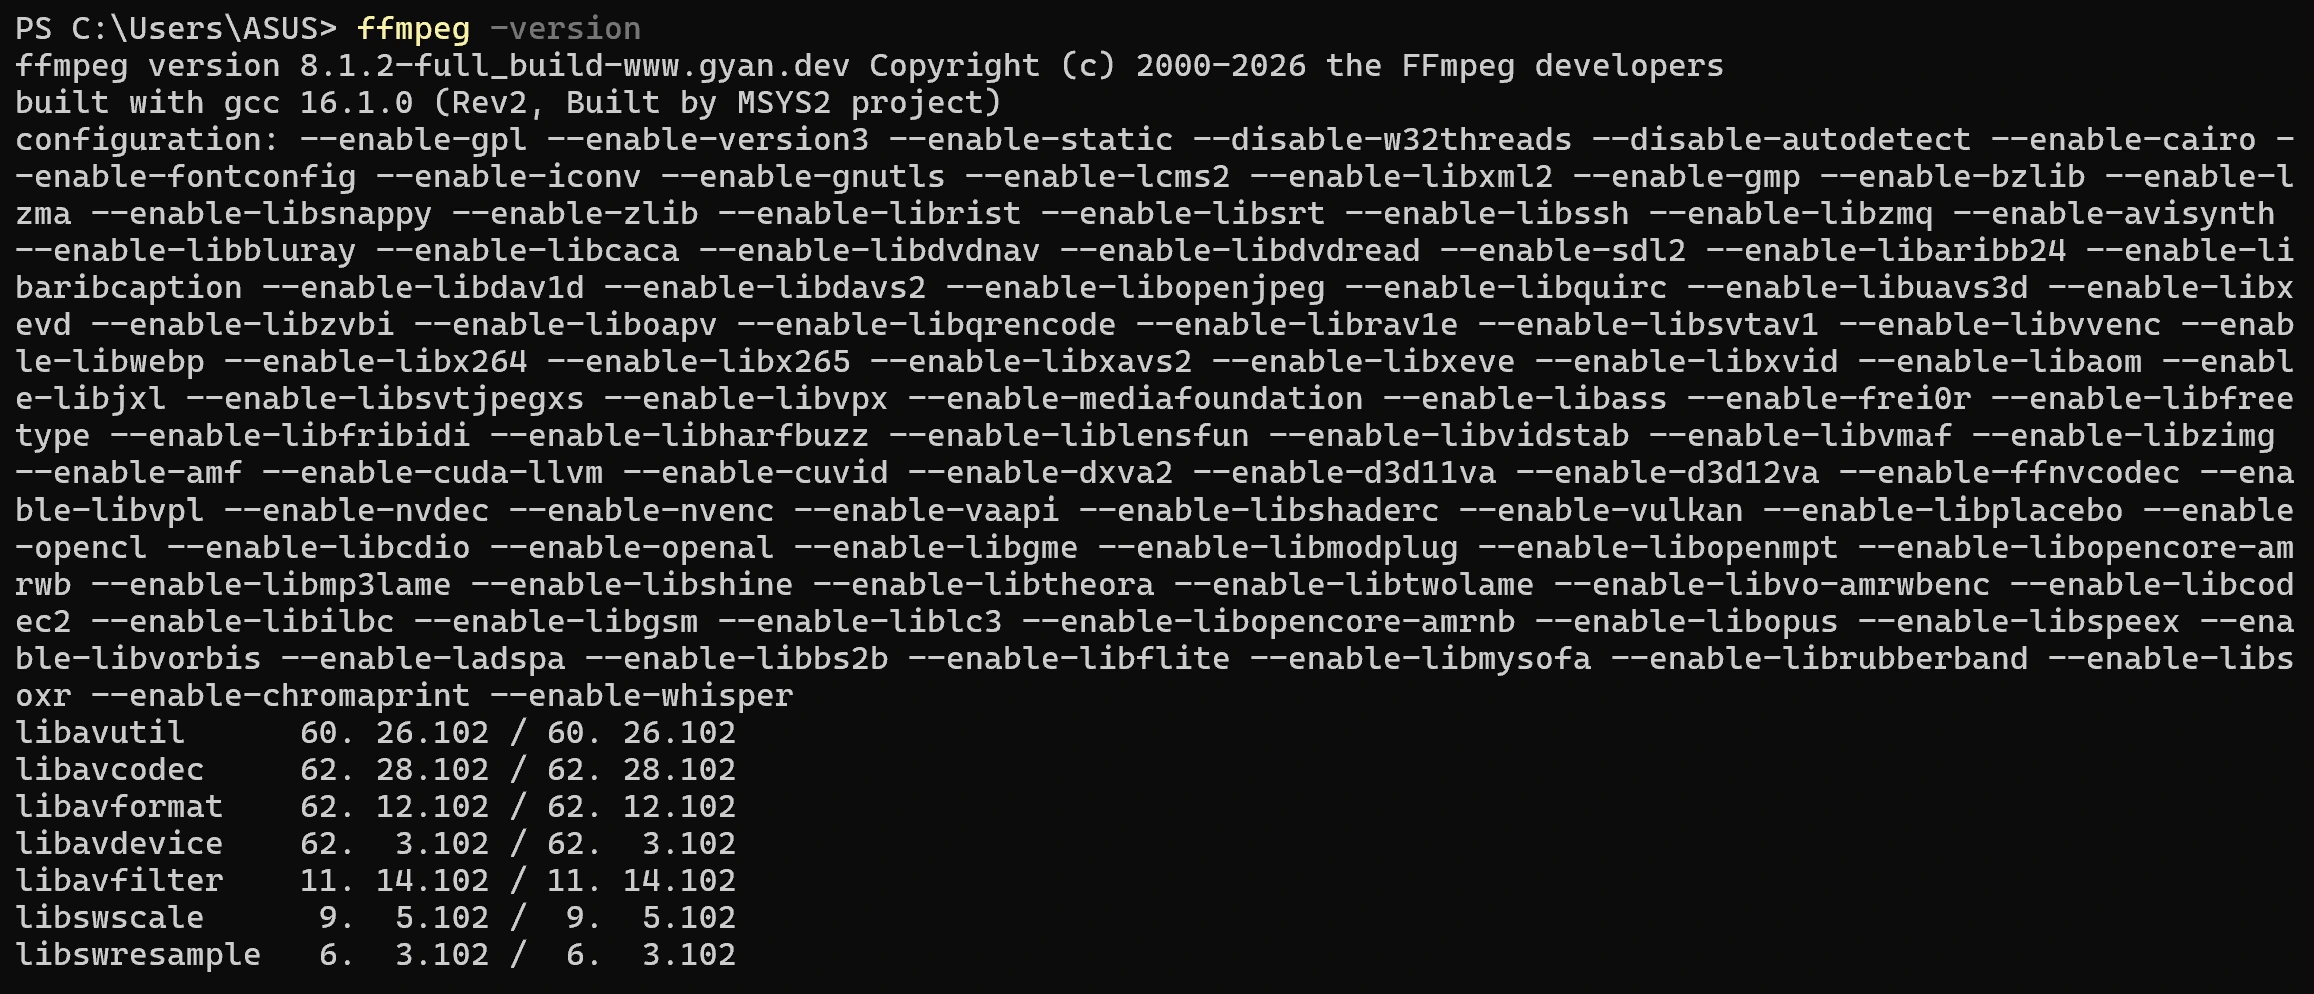
ffmpeg -version
You should see a version string and a long line of build flags, not "command not found" or "not recognized."
Check whether your file has chapters
Before you convert anything, find out whether your M4B actually has chapter markers, since that's what decides which option you'll use in the next section.
First, get the file's exact path instead of typing the filename
The single most common way this step "fails" has nothing to do with chapters.
Typing just a filename, like audiobook.m4b, only works if your
terminal happens to already be sitting in the exact same folder as the file,
and it usually isn't, whether the file is in Downloads, on a USB drive, or
somewhere custom. The fix that works no matter where the file lives is to copy
the full path instead of typing any of it.
Windows
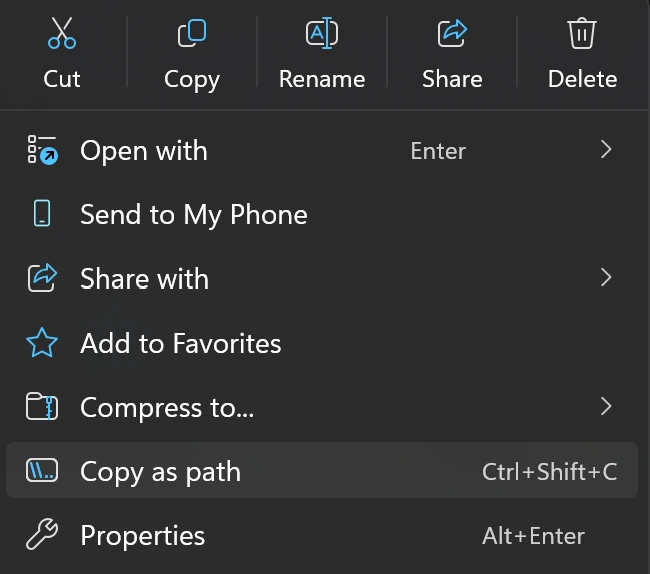
In File Explorer, find your .m4b file.
Right-click it and choose Copy as path. (On older Windows 10 builds, this option is hidden unless you hold Shift while right-clicking.)
That copies the complete path to your clipboard, already wrapped in
quotes, for example "D:\Downloads\audiobook.m4b". You'll paste
this directly into the command below.
macOS
Easiest option: open Terminal, then just drag the file from Finder straight into the Terminal window. Finder will type out the full, correctly escaped path for you automatically. Nothing to copy or remember.
If you'd rather copy it ahead of time: in Finder, right-click the file, hold Option, and the menu item changes to "Copy 'filename' as Pathname." Click it.
Linux
Easiest option: drag the file from your file manager (Nautilus, Dolphin, etc.) straight into your open terminal window. Most terminal emulators paste the full path for you automatically, same as on macOS.
If your file manager doesn't support that, navigate to the file's
folder, copy the folder path from the address bar (Ctrl+L
often reveals it as editable text), and type the filename onto the end
yourself.
Now run the chapter check
Paste the path you just copied in place of the filename below, keeping the quotes (Windows already added them; on macOS/Linux, add your own if the path has spaces in it):
ffprobe -v quiet -print_format json -show_chapters "PASTE_YOUR_COPIED_PATH_HERE"
For example, a real Windows path would look like:
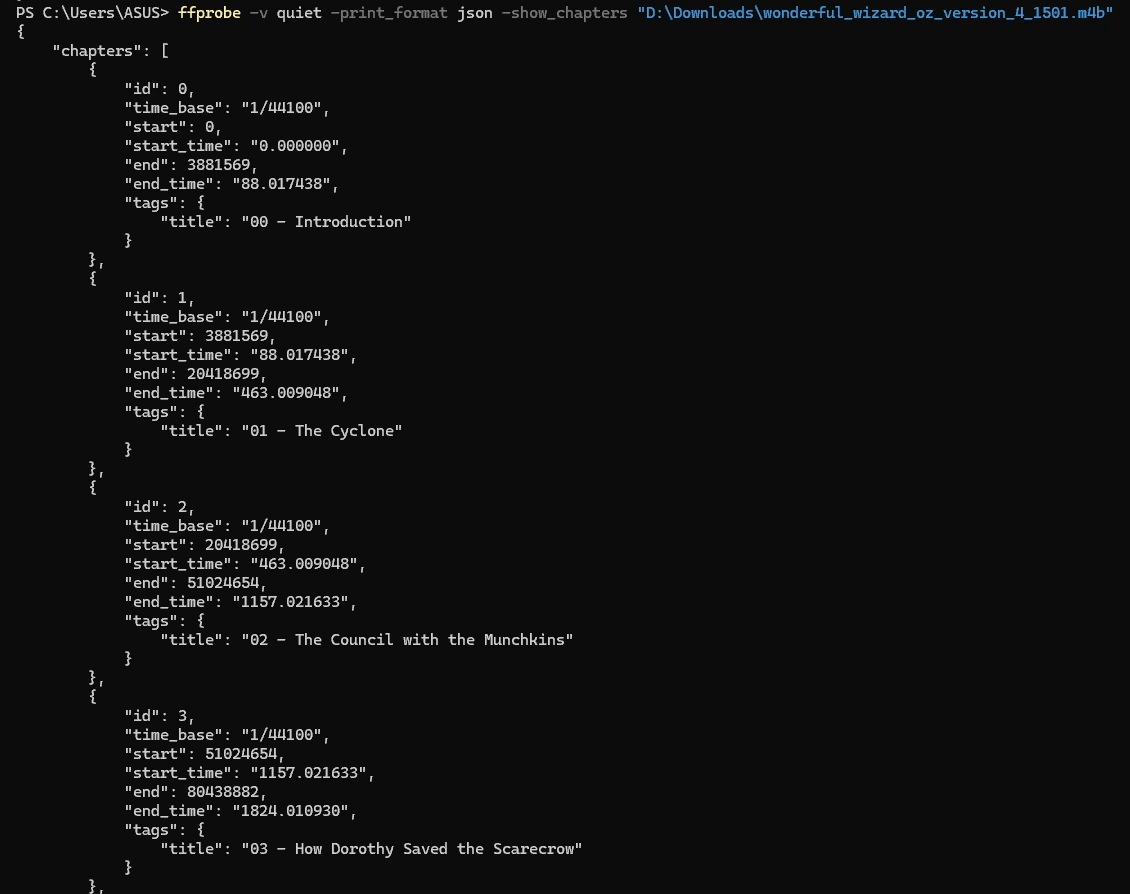
ffprobe -v quiet -print_format json -show_chapters "D:\Downloads\wonderful_wizard_oz_version_4_1501.m4b"
This prints JSON with a chapters array. Each entry has a title,
a start_time, and an end_time in seconds. That's
everything needed to slice the file later.
{} back with nothing inside? That's
not necessarily "no chapters." -v quiet also hides the error
if ffprobe can't find the file at all, and an empty result looks identical
to a real one at a glance. Double-check the path you pasted is exactly
right (re-copy it using the steps above rather than re-typing it), or drop
-v quiet for one run to see the actual error instead of a
silent empty result.
"chapters" lists entries, your file has chapter data, so use
Option B in the next section to get one MP3 per chapter.
If it's an empty array ([]), there's no chapter data to work
with (common on audiobooks ripped from CDs or downloaded without metadata),
so go straight to Option A for a single MP3 instead.
Chapterization can't recover data that was never there.
Convert M4B to MP3
Two options, depending on what the previous step told you.
Same rule as the chapter check: use the path you copied earlier instead of typing a filename, especially if the file isn't in your terminal's current folder.
Option A: single MP3 file
Use this if your file has no chapters, or if you genuinely just want one file.
Paste your copied path in place of PASTE_YOUR_COPIED_PATH_HERE:
ffmpeg -i "PASTE_YOUR_COPIED_PATH_HERE" -q:a 0 output.mp3
For example:
ffmpeg -i "D:\Downloads\wonderful_wizard_oz_version_4_1501.m4b" -q:a 0 output.mp3
Here's what the flags mean:
-i "...": the input file, your copied path in quotes-q:a 0: VBR quality setting, where 0 is the highest quality. Use-q:a 2for a smaller file with barely noticeable difference, or-q:a 5if size matters more than fidelity.output.mp3: ffmpeg infers the MP3 format from the file extension. This one's fine to leave as a plain filename, it'll save into whatever folder your terminal is currently in.
This puts the entire audiobook into one MP3 file. If it's 12 hours long, you get one 12-hour MP3 with no chapter markers your player can jump between. If that's a problem, use Option B instead.
-q:a 0 if you care about quality, -q:a 2 for everyday listening. The difference is hard to hear, but the file size difference (roughly 30%) can matter if you're loading an SD card.
Option B: one MP3 per chapter
ffmpeg has no built-in "split by chapters" flag, so the script below loops
through the chapter list from ffprobe and calls ffmpeg once per
chapter to cut and encode it as its own MP3. It uses Python 3, which is built
into macOS and most Linux distros, and available via the Microsoft Store on
Windows.
Here's the script. Don't worry if you've never written or run a Python file before, the walkthrough right after it covers saving and running with nothing more than what's already on your computer.
#!/usr/bin/env python3
# m4b-to-chapters.py
# Splits an M4B audiobook into individual MP3s, one per chapter.
# Requires: ffmpeg + ffprobe on your PATH
#
# Usage:
#   python3 m4b-to-chapters.py audiobook.m4b
#   python3 m4b-to-chapters.py audiobook.m4b --quality 2

import argparse, json, os, re, subprocess, sys
from pathlib import Path

def probe_chapters(path):
    result = subprocess.run(
        ["ffprobe", "-v", "quiet", "-print_format", "json",
         "-show_chapters", str(path)],
        capture_output=True, text=True
    )
    return json.loads(result.stdout).get("chapters", [])

def safe_name(title):
    return re.sub(r"[^\w\s-]", "", title).strip().replace(" ", "_")[:80]

def convert(m4b_path, quality=0):
    src      = Path(m4b_path)
    chapters = probe_chapters(src)

    if not chapters:
        print("No chapter markers found. Converting as a single file.")
        out = src.with_suffix(".mp3")
        subprocess.run(["ffmpeg", "-y", "-i", str(src),
                        "-q:a", str(quality), str(out)], check=True)
        return

    out_dir = src.parent / (src.stem + "_chapters")
    out_dir.mkdir(exist_ok=True)
    print(f"Found {len(chapters)} chapters → {out_dir}/\n")

    for ch in chapters:
        i     = int(ch["id"]) + 1
        title = ch["tags"].get("title", f"Chapter {i}")
        start = ch["start_time"]
        end   = ch["end_time"]
        fname = f"{i:02d}_{safe_name(title)}.mp3"
        out   = out_dir / fname

        subprocess.run([
            "ffmpeg", "-y",
            "-ss", start, "-to", end,
            "-i", str(src),
            "-q:a", str(quality),
            "-map_metadata", "-1",
            "-metadata", f"title={title}",
            "-metadata", f"track={i}",
            str(out)
        ], capture_output=True, check=True)
        print(f"  converted: {fname}")

    print(f"\nDone. {len(chapters)} MP3s saved to {out_dir}/")

if __name__ == "__main__":
    p = argparse.ArgumentParser(description="Split M4B into chapter MP3s")
    p.add_argument("input", help="Path to .m4b file")
    p.add_argument("--quality", type=int, default=0,
                   help="VBR quality: 0 (best) to 9 (smallest). Default: 0")
    args = p.parse_args()
    convert(args.input, args.quality)
Save the script as a .py file
No need for VS Code or any code editor here. Any plain text editor will do,
including whatever's already built into your computer. The only thing to
watch for is two small traps: Notepad on Windows quietly tacks on a
.txt extension unless you stop it, and TextEdit on Mac saves rich
text by default, which will corrupt the script without you noticing. Both are
a non issue once you know they're there.
Windows (Notepad)
Click Copy on the code block above to grab the whole script.
Open Notepad. Press the Windows key and type "notepad," it's already on your computer, nothing to install.
Paste the script with Ctrl+V.
Go to File, then Save As.
Find the "Save as type" dropdown near the bottom of the
dialog and change it from "Text Documents (*.txt)" to
"All Files (*.*)". Easy to skip past, but it matters:
without it, Notepad saves the file as
m4b-to-chapters.py.txt and Python won't touch it.
Type m4b-to-chapters.py into the File name
field, pick a folder you'll remember, and click Save.
macOS (TextEdit)
Copy the script, then open TextEdit. It's built in, search for it with Spotlight if you don't have it pinned anywhere.
Before you paste, or any time before you save, go to
Format, then Make Plain Text (or just
press Shift+Cmd+T). TextEdit opens in Rich Text mode by
default, and that adds formatting you can't see but that's enough to
break a Python script.
Paste the script, go to File, then Save, name it m4b-to-chapters.py, and save it somewhere you'll remember. If TextEdit asks whether to keep ".py" or use ".txt," keep ".py."
Linux (any text editor)
A GUI editor like GNOME Text Editor, gedit, or Kate saves plain text by
default, so just open one, paste the script, and save it as
m4b-to-chapters.py. No traps to worry about here. If you'd rather
stay in the terminal:
nano m4b-to-chapters.py
Paste the script in (usually right-click and Paste, or Ctrl+Shift+V),
then press Ctrl+O to save and Ctrl+X to exit.
m4b-to-chapters.py.txt instead of
m4b-to-chapters.py. On Windows, turn on "File name extensions"
under File Explorer's View tab to see what you're actually working with. On
macOS, the extension shows in Finder by default unless someone's hidden it.
Either way, just rename the file and drop the trailing .txt.
Run it
Open Terminal (macOS/Linux) or Command Prompt / PowerShell (Windows).
Get the script's full path the same way you got your audiobook's path
earlier (right-click and Copy as path on Windows, drag it into the
terminal on macOS/Linux). There's no way to guess where you saved it, so
don't rely on typing just m4b-to-chapters.py, the same
"wrong folder" problem from before applies here too.
Then run it with both paths, script first, audiobook second:
python3 "PASTE_SCRIPT_PATH_HERE" "PASTE_AUDIOBOOK_PATH_HERE"
For example:
python3 "C:\Users\ASUS\Desktop\m4b-to-chapters.py" "D:\Downloads\wonderful_wizard_oz_version_4_1501.m4b"
If the script happens to be in the same folder your terminal already opened in, the plain filename works fine on its own too, but pasting the full path is what works every time, regardless of where you saved it.
python3 before the
real thing ever gets a chance to run. If you don't have Python yet,
go ahead and let it install from the Store. If you already installed
Python from python.org, that installer registers the command as
py instead, so swap it in:
py "PASTE_SCRIPT_PATH_HERE" "PASTE_AUDIOBOOK_PATH_HERE". To
get rid of the placeholder for good, go to Settings, then Apps, then
Advanced app settings, then App execution aliases, and turn off the
Python entries there.
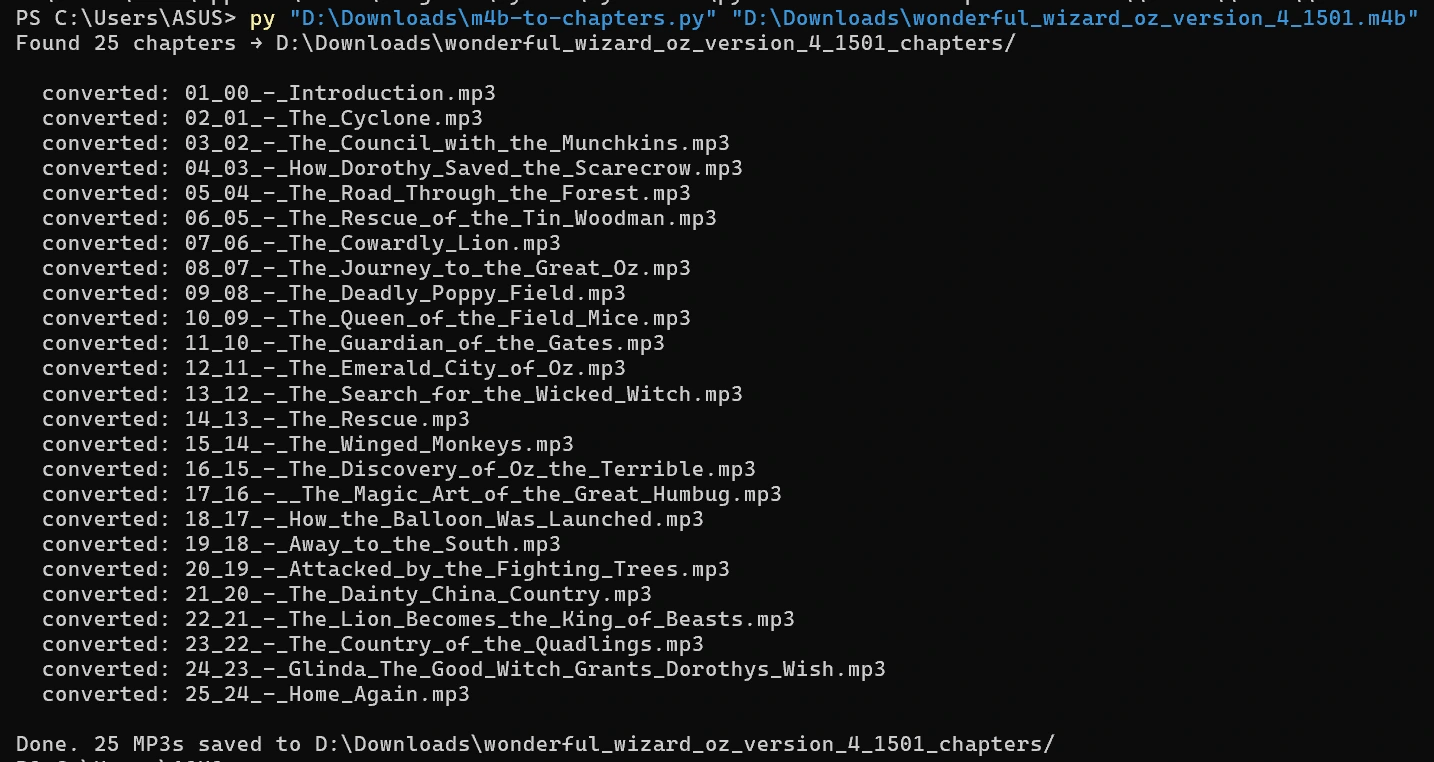
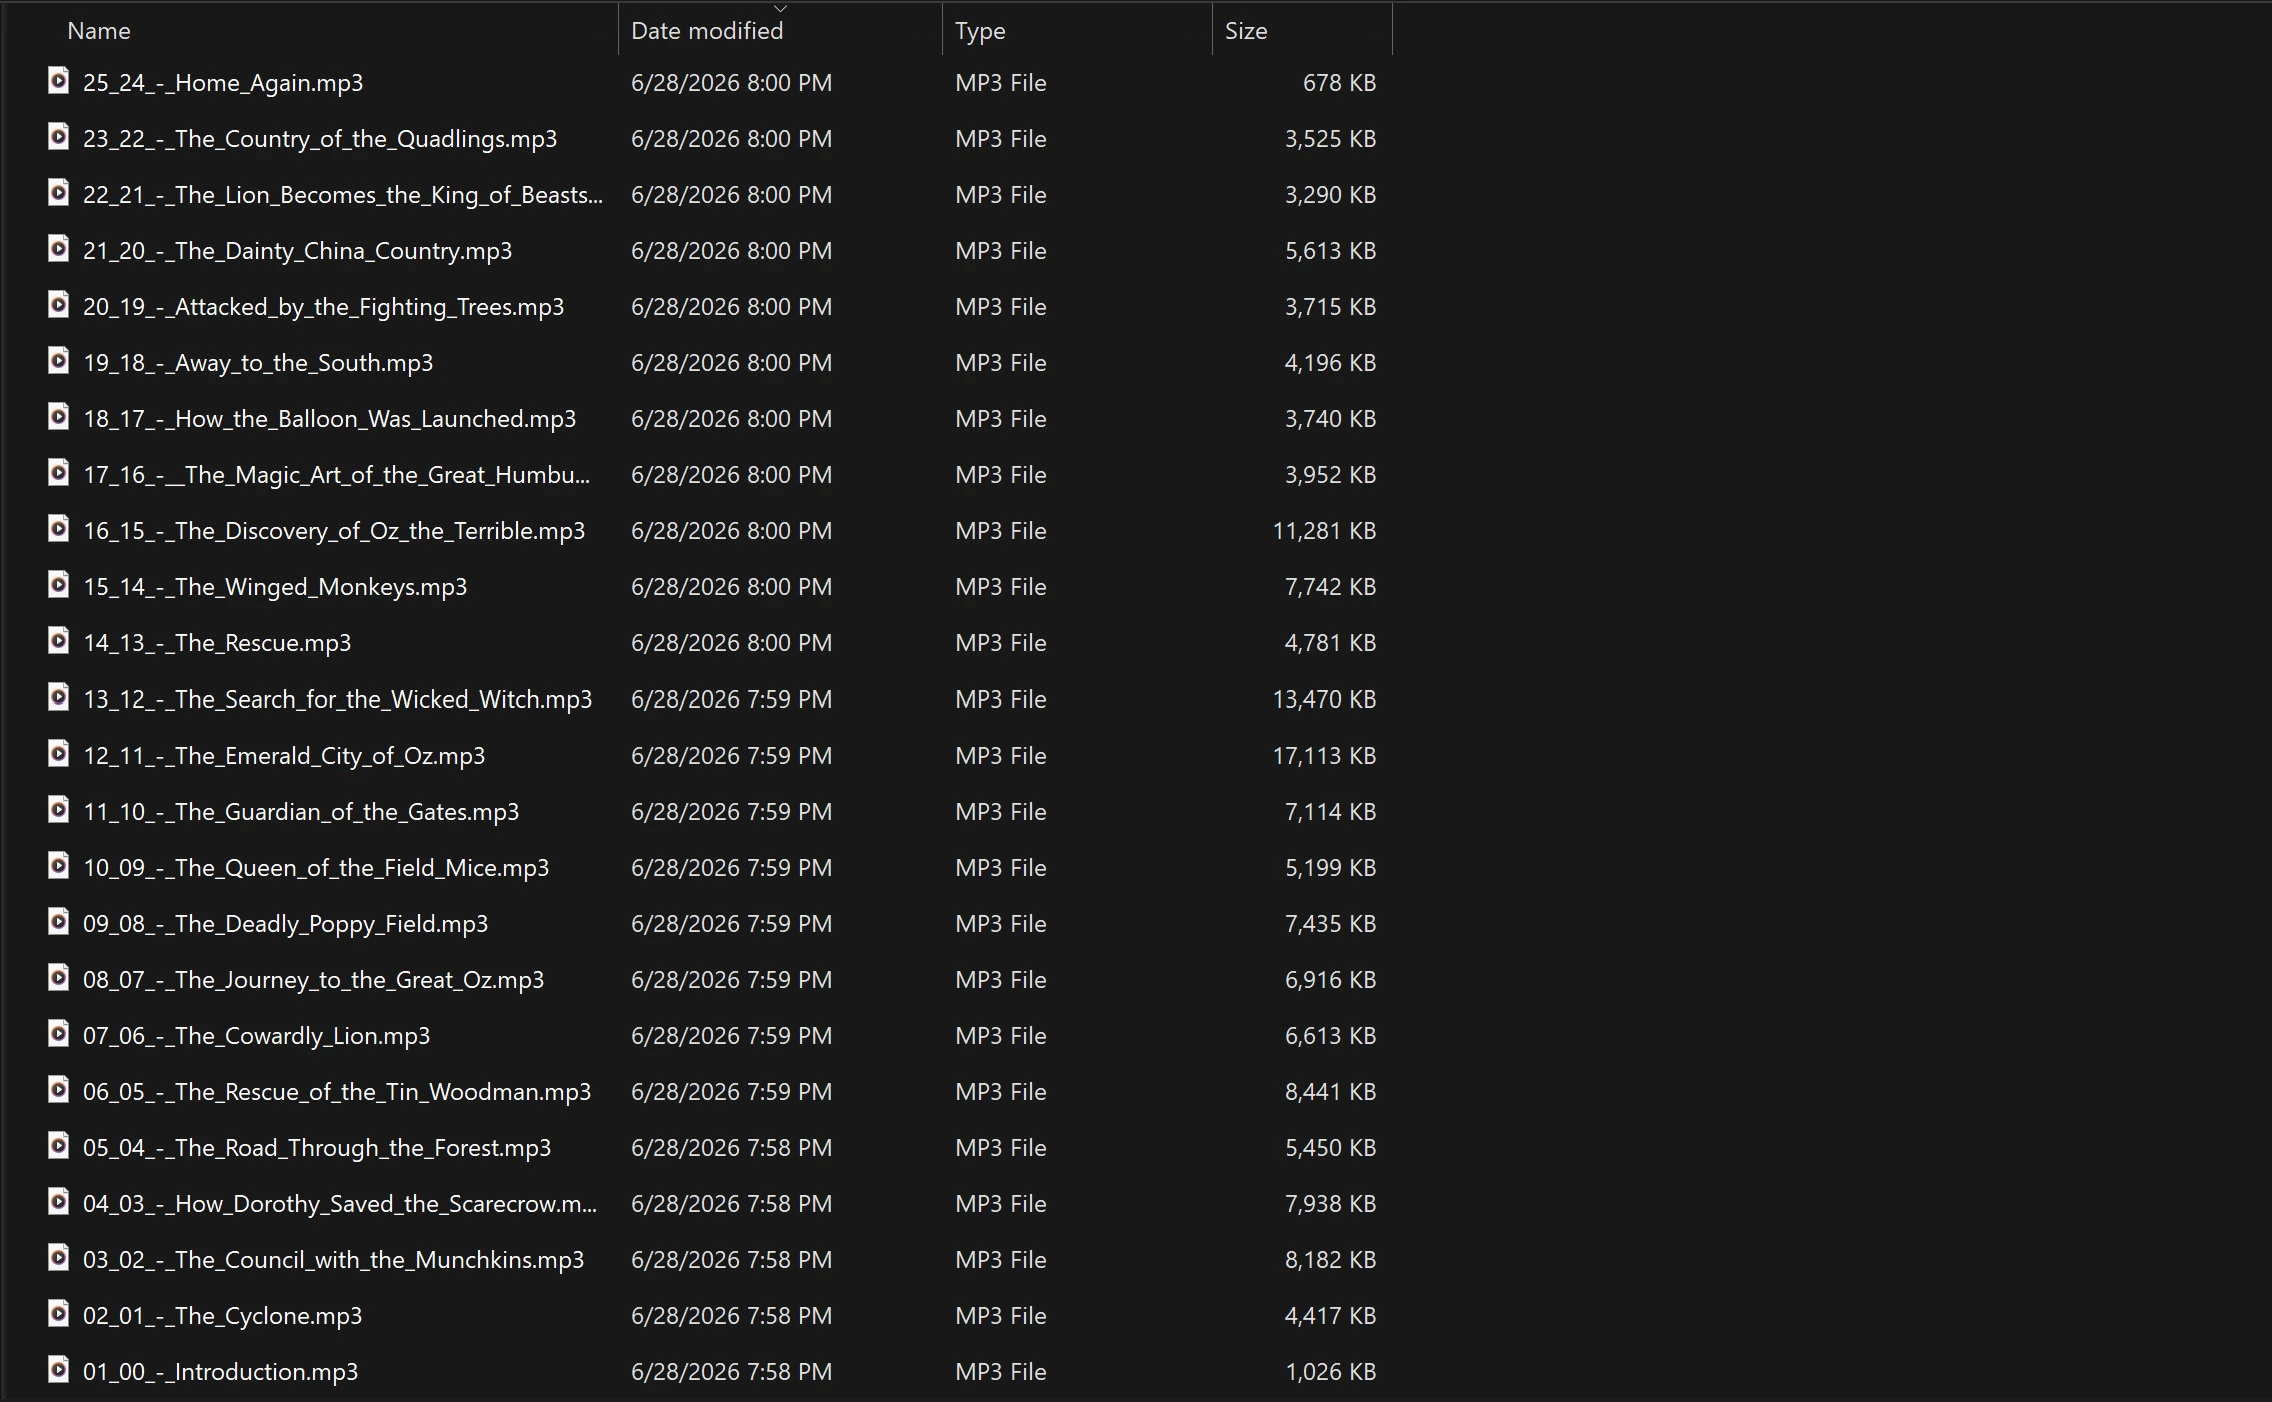
The script creates a new folder named <your-file-name>_chapters/ right next to the audiobook itself, not next to the script. So for the example above, look in D:\Downloads\wonderful_wizard_oz_version_4_1501_chapters\. Inside, you'll find numbered MP3 files, one per chapter, with the chapter titles as filenames.
--quality 2 for a noticeably smaller file that still sounds good at normal listening speeds. --quality 0 (the default) targets roughly 245 kbps VBR, which is more than enough for speech.
Load the folder onto your device and any MP3 player will see them as separate tracks in order. Most car stereos and dedicated MP3 players handle a folder of sequentially named files exactly like chapters.
Troubleshooting
ffprobe returns {} with no chapters, but I know the file has them
This is almost always a file-not-found error hiding behind -v quiet,
not actually missing chapter data. ffprobe suppresses the "no such file or
directory" message along with everything else when that flag is set, so it
looks identical to a real empty result. Confirm the file is actually where you
think it is (dir *.m4b on Windows, ls *.m4b on
macOS/Linux), or just use the full path,
e.g. "D:\Downloads\audiobook.m4b" if your Downloads folder lives
on a different drive. Dropping -v quiet for one test run will show
you the real error instead of a silent {}.
The output MP3 has no chapters / just plays as one track
That's expected from Option A (single file). Use Option B above, or M4BConvert, to get individual MP3s per chapter.
The script says "No chapter markers found"
Some M4B files genuinely have no chapter table, especially ones converted from audiobook CDs or ripped from DRM-free downloads without chapter data. Run ffprobe -v quiet -print_format json -show_chapters yourfile.m4b to confirm. If the chapters array is empty, the file has no chapter data and the script will convert the whole thing to a single MP3 automatically.
Poor audio quality in the output
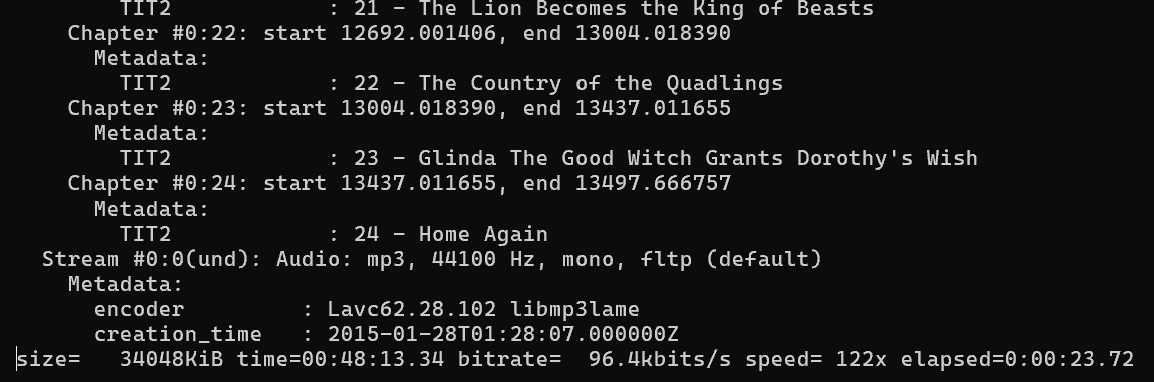
Make sure you're using -q:a 0 or at most -q:a 2. Higher numbers mean lower quality. Also, the source M4B is usually encoded at 64 kbps (common for speech audiobooks), so there's a ceiling to how good the output can sound regardless of the encoder settings. Converting at 64 kbps AAC input, you won't get CD-quality MP3 out; you'll get a clean re-encode of whatever was there to begin with.
Conversion is very slow on a large file
Option A should be fast (often faster than real-time on modern hardware). Option B calls ffmpeg once per chapter, which adds some overhead, but should still be quick. If it's crawling, check that ffmpeg isn't also transcoding video; use ffprobe yourfile.m4b to confirm it's audio-only.
Windows says to install Python from the Microsoft Store
That message comes from a Windows placeholder called an App execution alias, not from Python itself, and it shows up the moment you type python3 if Python isn't registered under that exact name. If you don't have Python yet, installing from the Store works fine. If you installed it from python.org instead, that installer registers the command as py, so use py m4b-to-chapters.py "your path here" instead of python3. You can also turn the placeholder off entirely at Settings, then Apps, then Advanced app settings, then App execution aliases.
Python says "ModuleNotFoundError" or the script won't run on Windows
The script only uses standard library modules, so there's nothing to pip install. Make sure you have Python 3.6 or later, and try py in place of python3 if that's what your install responds to (see the entry above). If you're on macOS or Linux, python3 should already work out of the box.
"ffmpeg is not recognized" even after installing on Windows
This almost always means PATH was updated but your terminal window is still the old one. Close every open Command Prompt / PowerShell window and open a fresh one. PATH changes only apply to new windows. If it's still not found after that, double check the exact folder path you added in the install step actually contains ffmpeg.exe.
Convert M4B to MP3 in your browser
M4BConvert is a free, browser-based M4B converter with a built-in chapter editor. Drop your file, preview chapters, rename or reorder them if you want, and export as individual MP3s. Nothing is uploaded; all processing runs locally with ffmpeg.wasm.
Try M4BConvert free